

Painting furniture is like therapy for me. Most people would say that about a hobby like gardening. But I enjoy turning a piece of furniture, old or new, into something unique. It is something I can work on as a project of my very own. That doesn’t involve work, or my husband, or my kids. Just me.
All that being said, it doesn’t necessarily mean I’m very good at it. Although I have gotten a lot better over the years, I definitely had a few pieces that were not Pinterest-worthy if ya’ know what I mean. But, I wanted to share some of the things I was doing wrong in the beginning and that have really improved the quality of the end product!
I also have to admit that (1) I am not a perfectionist, (2) I tend to rush because I’m so excited to get to the end product, (3) I tend to start several products at once. And I definitely have a lot of time to do these projects and they don’t lie around my house for weeks unfinished because I’m so excited to start a new project….
Anyways, I HAVE gotten better. I promise. So here are the things I have learned.
- For the love of god, avoid spray paint for furniture unless it’s for hardware or simple, flat surfaces (even then, try avoid). This is coming from someone who actually really adores spray paint until I try to use it.

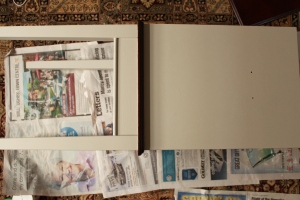
- Paint the furniture on its side (ie. side you are painting is horizontal to ground, like the below picture). Turn it as you progress (don’t try to paint the whole thing in one position, turn it so that you avoid painting vertically and risking drip spots…always watch for the drips!).
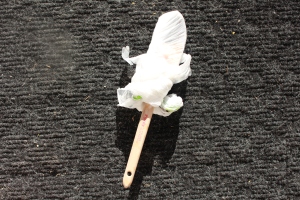
- Store the brush in a plastic bag between coats so that the paint doesn’t dry on the brush.
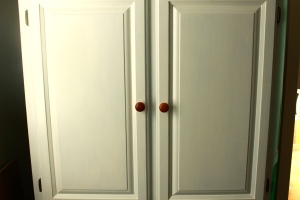
- If you want to paint a wood piece white – try an off white or a white with a tiny bit of grey or cream colour in it. I find pure white requires coat after coat after coat on wood (like the below piece that soaked up so much white paint I just gave up making it ‘pure white’). That’s just my opinion. Just a little bit of beige or grey in the paint goes a long way for coverage.
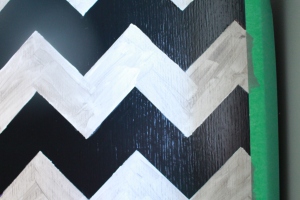
- If you need clean lines, try hand painting! I have battled lots with painters tape. It just never seems to work for me unless it’s on a wall. The paint always comes off with the tape or seeps underneath. I tried the chevron below with painters tape and I don’t even want to talk about how horrible the lines were when I pealed off the tape….
So, now I just hand paint the line and I like the finish a lot better.
Let me know your tips too so I can get even better at this furniture painting thing!


Great tips! I always pop my brushes in cling film. The paint stays wet for up to a week. I keep meaning to do a list like this of my own… my friends are *always* asking for tips and tricks! Another great post Ashley — thanks so much for sharing 🙂
Thanks so much for linking up with #HomeEtc — hope to see you again next week! x
Caro | http://www.thetwinklediaries.co.uk
LikeLike
Oh, that is a great idea re: cling film – is that like cling wrap? #HomeEtc
LikeLiked by 1 person
Yep – just the same thing. If you wrap your brushes up tight, the paint will stay good for days xx
LikeLiked by 1 person
Brilliant tips! I usually always leave the paint brushes to go dry so these are fab tips! Love painting wood and seeing the results. Thanks for sharing – Jess x #HomeEtc
LikeLike
Me too! Thanks for hosting your #HomeEtc love the posts these last few weeks 🙂
LikeLike
Great tips.. YES put the brush in a bag!! Great idea! Why didn’t I think of that! haha
http://2littlefaces.blogspot.co.uk/2015/06/diy-exposed-bulb-chandelier.html
LikeLiked by 1 person
Haha I tried putting the brush in cling wrap today and that worked really well too!!
LikeLike